Maybe you’re a marketer in an eCommerce company selling shoes. Your website has been up and running for a while, but you’ve noticed sales have steadily declined over the past few months, even though you’ve brought a decent amount of website traffic with your ad campaigns.
Or you work for a SaaS company where you get steady traffic but little to no leads or signups.
Whatever the case, it’s a sign that you need a comprehensive conversion rate optimization (CRO) audit. It will help you identify potential conversion barriers, understand the possible reasons for the low conversions, create new test hypotheses, and plan your CRO strategy.
In this article, I share the step-by-step process of conducting CRO audits from start to finish.

What Is a CRO Audit?
A CRO audit is an exhaustive evaluation of a website to determine why people are not taking desired actions like buying a product or service, subscribing to an email list, booking a call, downloading an ebook, etc. The ultimate goal of a CRO audit is increasing conversions.
When and Why You Should Do a CRO Audit
There are various situations when doing a conversions audit can be a good idea:
- Several months after launching a new website. These several months would give you enough data to analyze and assess if it’s working as intended.
- When something changes. For instance, say, you are tracking important metrics like bounce or conversion rate and notice a decrease. If you can’t immediately explain why it happened, it could be a good idea to carry out an audit to discover possible explanations.
- On a regular basis for continuous conversion optimization and to maintain a competitive edge. Auditing your website is a good exercise, as it almost allows you to find some previously overlooked problems and areas for improvement.
How To Conduct a Website CRO Audit in 12 Steps
The CRO audit framework we want to discuss consists of 12 steps (OK, in fact 13, but bear with me):
- Setting a business goal
- Identifying relevant metrics
- Ensuring that necessary tools are in place
- Running a technical website audit
- Analyzing conversions on strategic pages
- Running a drop-off analysis for common funnels
- Performing a UX analysis
- Organizing the findings
- Deciding what to fix and what to test
- Prioritizing and building a test roadmap
- Running the tests
- Following up on the tests
- Scheduling the next CRO audit
1. Start by Setting a Business Goal
The first thing to do is outline the goal you want to achieve, i.e., what you’re optimizing towards. This guides the conversion audit process and ensures your efforts align with the desired outcomes. When setting this, ensure it’s clear and specific – I’m sure you’ve heard about SMART goals a hundred times before.
Also, don’t say you want to “increase revenue.” That’s too broad and generic – and, most importantly, it doesn’t help you understand what you should be looking for. Instead, your goal can be to increase sign-ups, increase the number of checked-out carts, or improve user engagement.
Another important thing to do at this point is to align the goal with the relevant stakeholders and ensure you have their support. Otherwise – if nobody will act upon the findings from your audit, because they have other priorities – all your efforts may be in vain.
You need the stakeholders’ buy-in and cooperation for the audit process to be successful, as it guarantees you’ll have the resources (time of UX professionals, developers, and designers) required to implement any recommended changes.
2. Identify the Relevant Metrics You’ll Be Looking At
Next, identify the metrics that match the goal you determined in step one above. These metrics serve as a measure of success for your CRO audit.
If you’re in the eCommerce business and want to increase the number of checked-out carts, you might want to track eCommerce metrics like cart abandonment or conversion rates. For improving user experience, you can focus on tracking Click-Through-Rate (CTR), overall time on site, and bounce rate. And if you want to increase your content engagement, monitor scroll depth, time on page and bounce rate.
3. Make Sure You Have All the Tools You Need
To make data-driven decisions, you need data, right? That means you need the tools that can provide you with this data. The stakeholders’ support that you’ve secured earlier starts to pay off at this point already, as some of the tools cost money.
Below, we list some of the tools that we think are necessary to conduct a thorough conversion rate audit:
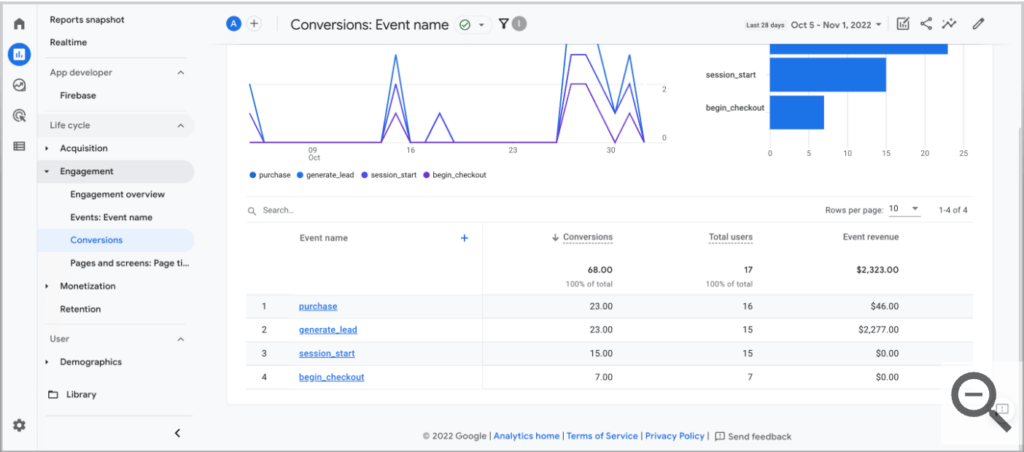
- For tracking metrics, set up events in Google Analytics (GA) (or Adobe Analytics, or whatever else you use for this purpose). You can also set revenue tracking with something like Hubspot.

Source: support.google.com
- For auditing, use a behavior analytics tool like Mouseflow that provides session replay and a broad spectrum of heatmaps, as well as conversion funnels. User behavior data is invaluable in understanding what actually happens on your website and why certain metrics are going up or down. By the way, we have a special guide on setting up Mouseflow specifically for CRO.

A click heatmap of Mouseflow’s demo page shows that users click a lot on the “Start Demo” and “Try for Free” buttons.
-
- After discovering what could’ve potentially gone wrong, you’ll likely need to run A/B tests to determine if your hypothesis is correct. There are plenty of good A/B testing tools out there – we recommend paying attention to how they integrate with your behavior analytics tool. That’ll help you separate behavior data for specific variants and get more precise behavior insights. For example, Mouseflow has integrations with most popular A/B testing tools like Convert Experiences, Kameleoon, AB Tasty, etc.
- You’ll need some place to take notes and write down your findings. We recommend using a spreadsheet like this one by Optimizely – once you fill it out, it’ll become a ready CRO roadmap that you can use for further optimization.
💡Pro tip: take these tools for a spin and familiarize yourself with them before starting the audit process to avoid getting stuck.
Are all the tools set up and running? Now, you’re ready for the actual action!
4. Run a Technical Website Audit
A technical website audit is an important part of the CRO audit process. This is because technical issues have a significant impact on the user experience (UX). For example, if the website is slow or has some broken links, it can impact usability in a negative manner, thus affecting the conversion rate. When conducting a technical analysis,
- Check site speed and load times to ensure it’s fast enough. Use Google’s Lighthouse or PageSpeed Insights for this.
- Test the website’s responsiveness on mobile, tablet, or desktop to confirm that users on all types of devices get an equally pleasant experience. You can use BrowserStack or just watch Mouseflow session recordings with sessions from different devices and browsers.
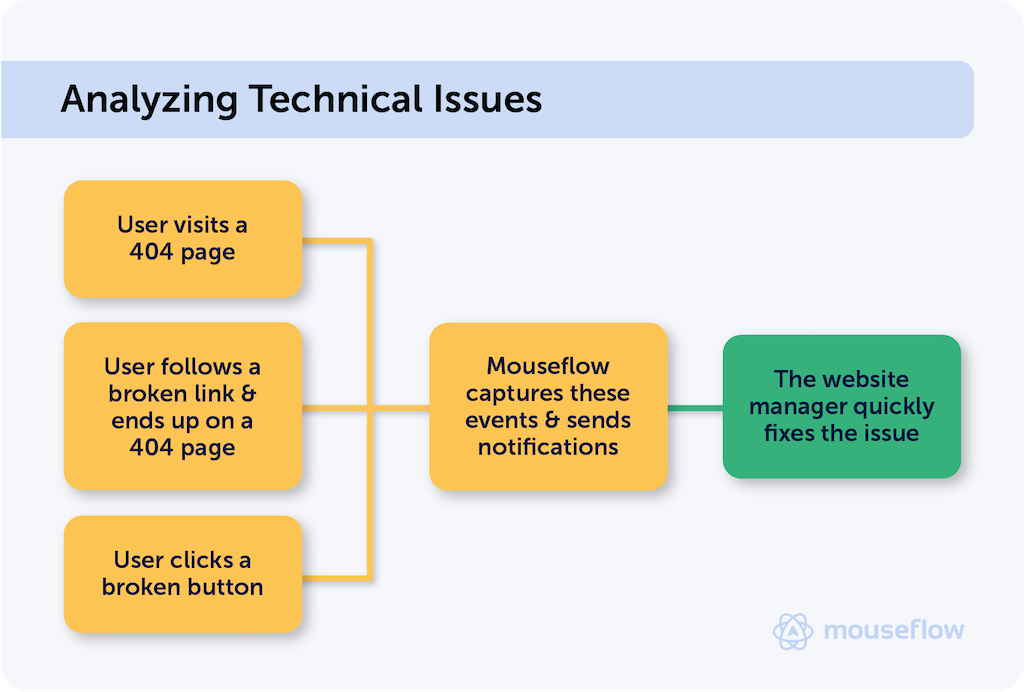
- Find errors that’ll affect usability. Try Screaming Frog SEO Spider to check for other response codes besides the HTTP 200 OK status code, AKA successful request. Watch out for status codes like 404 (page not found) or 5xx (server errors).
- Set up notifications for error reporting with Mouseflow so you can be on top of any issues. See how it works:

Once you’ve identified all critical technical areas of improvement, write them down to resolve later.
5. Analyze Conversions on Strategic Pages
Next, comb through certain pages to analyze their conversions. Remember, conversions don’t only mean direct sales. It could also mean other actions like form submissions, demo requests, or newsletter signups.
So, start by identifying key pages that impact conversions. This includes the high traffic and dollar value pages like product, landing, or pricing pages. Even if your page isn’t selling directly, calculate the monetary values associated with the lead-related events you’re tracking. By assigning a value, you can understand its impact on your CRO goals.
After pinpointing these pages, do the following:
- Use Mouseflow to set up conversion funnels for each of them. These conversion funnels help you visualize user behavior and see the role a page plays in the conversion process. Also, conversion funnels help with calculating conversion rates.
- Check all conversion rates to see their performance. Write all that down, you’ll need this data later to analyze how proposed changes impact your website performance.
- Then, analyze which traffic source has the highest and lowest conversion rates. You can use source dimension in GA or filter by UTM sources in Mouseflow.
6. Run a Drop-off Analysis for Common Funnels for Your Industry
A drop-off analysis aims to find the specific stages and pages where users abandon the conversion funnel. It also provides insights into why the drop-off happens, i.e., helps you detect friction points preventing conversions.
The funnels your site visitors go through vary by industry, so consider that when conducting this analysis. For example, these are the funnels that Clémence Lepers, a marketing advisor and founder of CL Consulting & Advisory, recommends looking into:
- In the eCommerce industry, the common funnel progression is: collection → product → add to cart (ATC) → checkout.
- For SaaS, it’s: landing/product page → demo → sign-up.
- And for B2B, the funnel is: landing/product page → form → form submission.
For the analysis, you can create funnel reports in Google Analytics to identify the drop-off pages – or use the very same conversion funnels in Mouseflow. Mouseflow’s conversion funnels allow you to watch session recordings of those who dropped at each stage to pinpoint the exact reasons causing potential customers to leave (but that’s for later). Take note of where users drop off the most and why they do so. Create a list of pages to analyze based on the research you’ve done so far.
7. Perform a UX Analysis
According to The State of eCommerce 2023 report by Storyblok, 60% of customers abandon purchases because of poor UX experience. Furthermore, mid-sized eCommerce companies claim their poor website visitor experience costs them an estimate of $72,000 in lost sales annually. To be honest, we think by “poor” they mean “absolutely terrible”, and the real number is much higher. This makes it essential to conduct a UX analysis to evaluate the user’s overall experience with your website. To perform this analysis,
- Evaluate scrollmaps and clickmaps of the key pages to see areas of interest, disinterest, and interaction.
- Check the list of session replays in Mouseflow to see if visitors experience click rage or click errors to determine website elements that aren’t working correctly.💡Pro tip: you can sort the list of recordings by friction events to speed up the process.
- Employ attention heatmaps to see where users spend their time on a webpage and which parts of it they skip. Do they tend to overlook your key messages?
- Investigate high bounce rate pages – again, sort session recordings by “bounce” event and watch them to learn why bounce occurs.
- Look into the high drop-off pages found in the previous step.
- Study visual hierarchy, flow, heuristics, effectiveness of CTAs, etc.
Review each important page against the 7 core UX principles: user-centricity, consistency, hierarchy, context, user control, accessibility, and usability. Ensure your website meets these principles.
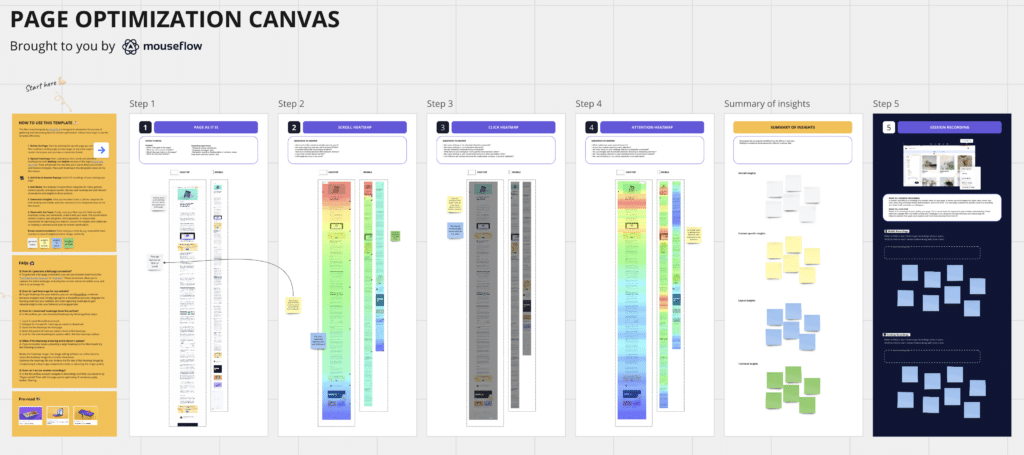
If you’re stuck on this step, check out the 5-step optimization framework we use when we need to optimize a page. It makes it easier for us – and other marketers – to uncover design challenges and areas of improvement in UX.

Watch a webinar on how to boost conversions with the 5-step webpage optimization framework.
8. Organize All Your Findings in One Place
After conducting a technical audit, drop-off and UX analysis, and analyzing page conversions, it’s time to organize all your findings. We hope you’ve been using a spreadsheet like this in all the previous steps, and now you only need to comb it a little bit to make it easier to work with. When recording your results, focus on the what, where, and why. Remember to include data as proof.
For best results, gather insights from multiple sources as each data source offers unique perspectives, and the combination of all of them is a treasure trove of information about your website’s performance and user behavior. Got data from GA4? See if heatmaps prove it. Seen something in session recordings? Launch a feedback survey and ask users if they think this is an area that needs improvement. You can also use user testing if you need another source.
Get at least two correlating data sources per hypothesis – that makes them much more likely to be true. And you want good hypotheses so that you don’t spend precious time on testing something meaningless.
Read more about designing data-driven CRO hypotheses.
9. Decide What’s a Fix and What’s an Idea for an A/B Test
Some of the things you’ll find can be categorized as errors. These don’t need any testing – you can fix them. So, categorize your findings into two groups: fixes and ideas for A/B testing. Fixes like broken links, server errors, or page loading issues don’t require testing, but still need prioritization. Ideas for A/B testing are something that you’d rather prove to be right or wrong. They also need prioritization though.
Make sure that in your spreadsheet you’ve been using for taking notes you separate fixes from hypotheses. For hypotheses, you’ll need to write what to test, why you’re running the test, how/why variations will change user behavior, and the experiment’s estimated impact. It will guide the testing process and help measure the effect of your changes on conversion rates.
10. Prioritize – And Have a Nice Experimentation Roadmap
Now, prioritize these findings based on their potential impact on conversion rates and the feasibility of implementation. The spreadsheet we shared has a prioritization index and level (high, medium, and low) to make for accurate categorization.
By prioritizing, you’ll end up with a CRO roadmap that outlines the order in which you will address the fixes and test the ideas. This roadmap will help you stay organized and allocate resources accordingly.
That’s the point where you can start communicating your plans to the development and design teams, so that they can start resolving problems and create variations for tests.
11. Start Running A/B Tests
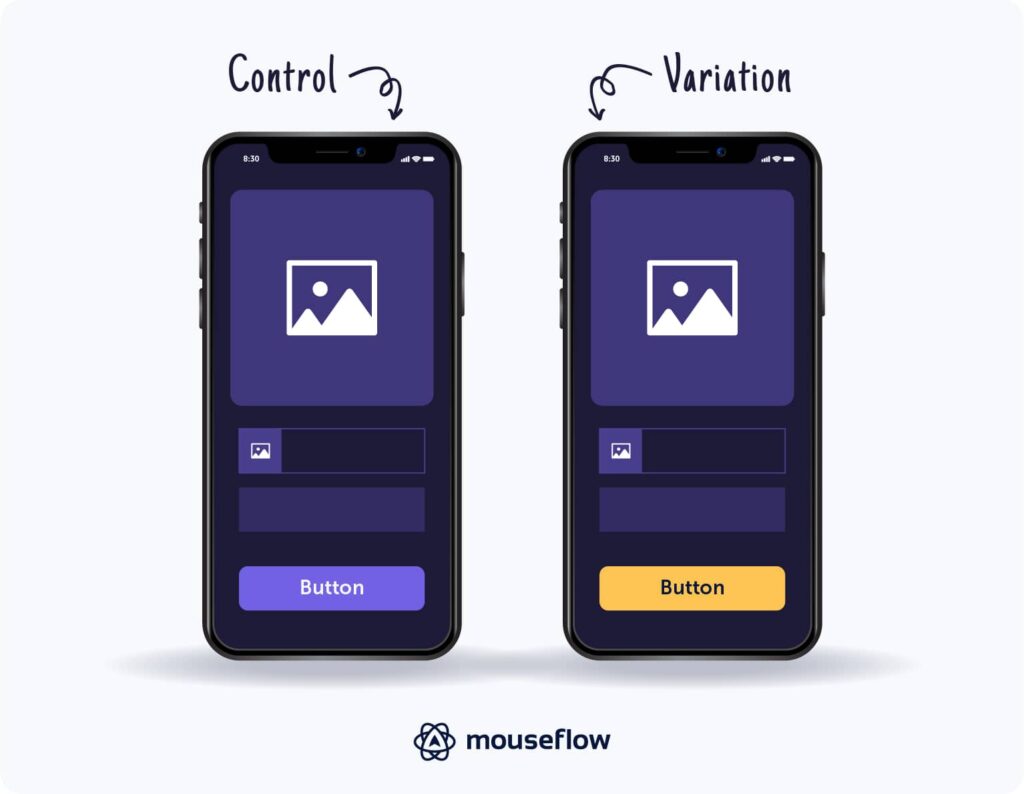
Begin implementing the CRO tests in the order outlined in the experimentation roadmap above. Have your control and variation group(s) in place to test different elements, strategies, or designs.

Use a behavior analytics tool like Mouseflow to monitor users’ behavior both in control and variation. Are they behaving the way you expected them to? That can also give you ideas for further hypotheses.
Document your findings and any new hypotheses you discover in the same spreadsheet you’ve been using.
12. Follow up on Your A/B Tests
Assess each A/B test conducted above to determine whether it is statistically significant, so that you’re certain your result is not random.
If this condition holds and test results match the hypothesis you formed previously, kick off the changes across your website. If not, likely you have some ideas what went wrong – time to add a new hypothesis to the spreadsheet!
Keep in mind, however, that the value of these tests goes beyond identifying winning variations. It’s also about the learnings you extract from each experiment. Develop a long-term mindset, and even if a test appears as a failure, it has likely gave you some good ideas for further experimentation.
Keep running the tests!
13. Schedule the Next CRO Audit
Yes, that’s point 13 out of 12. Congratulations on coming this far. By now, you’ve completed the CRO audit process and started seeing a markup in your conversions. But the optimization journey doesn’t end here. You should run this audit regularly so that your website keeps improving and evolving to meet users’ needs. So, schedule your next conversion optimization audit for 6-12 months.
Conclusion
Regardless of the business niche and the level of success you’re experiencing, there is always room for improvement. With this mindset, you can continually enhance customer experience, increase conversions, and keep the business thriving.
If you need to start this improvement process somewhere – start it with a CRO audit. Follow the steps outlined in this guide to apply a structured and systematic approach to performing this audit.


